- Identify the source of the leak: Determine whether your two-handle faucet uses washers, O-rings, or cartridges to know what needs replacing.
- Gather the right tools and materials: Having wrenches, screwdrivers, pliers, replacement parts, and cleaning supplies ready makes repairs smoother.
- Shut off the water supply first: Always turn off both hot and cold valves and drain remaining water before starting to prevent flooding.
- Replace worn components carefully: Remove old washers, O-rings, or cartridges, clean parts and valve seats, and install new components with proper alignment and lubrication.
- Reassemble and test: Put handles back in place, secure screws, restore water, and test both hot and cold water to ensure the leak is fixed.
- Maintain regularly and avoid common mistakes: Check for wear, clean mineral buildup, and avoid overtightening nuts to prevent future leaks.
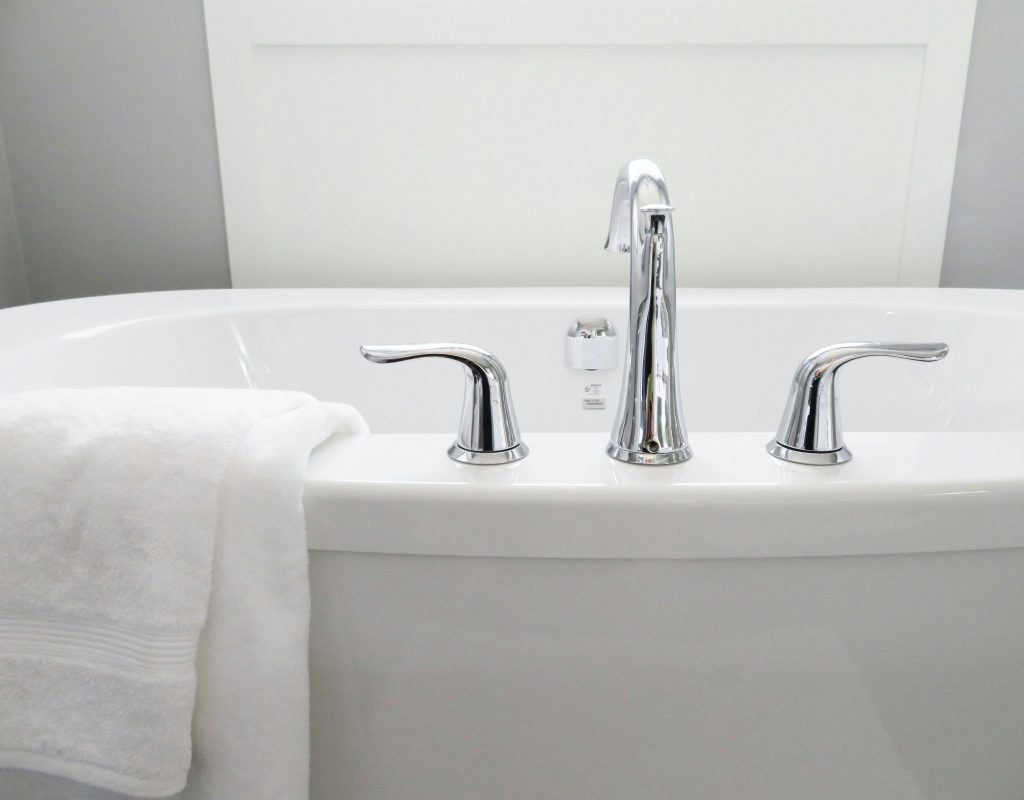
A dripping or leaky bathtub faucet can be more than just a minor annoyance. Drips waste water, increase utility bills, and can even lead to water damage if ignored. If your bathtub has a faucet with two handles, repairing it yourself is possible with some basic tools and patience. This guide will show you how to fix a leaky bathtub faucet with two handles step by step, covering both traditional washer-style faucets and modern cartridge-based designs.
Why Your Bathtub Faucet Leaks
If you’re wondering how to fix a leaky faucet, understanding the root cause of the drip is the first step. Two-handle faucets generally leak because of:
- Worn-out washers – Common in older faucets, these flat rubber pieces seal water flow and can wear down over time.
- Damaged O-rings – Small rubber rings around the stem prevent water from escaping; cracks or deterioration can lead to drips.
- Corroded valve seats – Mineral buildup can create gaps where water escapes.
- Faulty cartridges – Many newer faucets use cartridges controlling water flow; a faulty cartridge can cause leaks.
- Loose handles – Handles that are not properly tightened can contribute to small drips.
Identifying whether your faucet uses washers or cartridges will guide the repair process and make it easier to successfully stop the leak.
Tools and Materials You’ll Need
Before starting, make sure you have:
- Adjustable wrench or basin wrench
- Screwdrivers (flathead and Phillips)
- Replacement washers, O-rings, or cartridges (depending on faucet type)
- Tongue-and-groove pliers
- Plumber’s grease
- Cleaning cloths
- White vinegar (for removing mineral deposits)
- Bucket or towel to catch drips
Having everything ready will make the repair process faster and less frustrating.
How to Fix a Leaky Bathtub Faucet with Two Handles in 7 Steps
Step 1: Shut Off the Water Supply
Always start by turning off the water supply to prevent flooding.
- Locate the main water shut-off valve for your home.
- Turn off both hot and cold water valves completely.
- Open both faucet handles to release any remaining water in the pipes.
This ensures a dry, safe workspace while you work on the faucet.
Step 2: Remove the Faucet Handles
Handles can be decorative, so careful removal is important.
- Look for a small cap on the top of each handle; gently pry it off with a flathead screwdriver.
- Use a Phillips screwdriver to remove the screw beneath the cap.
- Lift the handle straight off.
- If it feels stuck, gently wiggle it or use a handle puller to avoid damage.
Once the handles are off, you’ll have clear access to the faucet stems or cartridges.
Step 3: Inspect the Faucet Internals
Check whether your faucet uses a traditional washer system or a cartridge.
- Washer-style faucets: These have a stem with a washer at the bottom. Worn washers or O-rings are usually the cause of leaks.
- Cartridge-style faucets: Modern two-handle faucets often have cartridges controlling water flow. Leaks typically originate from a faulty cartridge.
Knowing which system you have ensures you use the correct replacement parts.
Step 4: Remove the Old Washer or Cartridge
For washer-style faucets:
- Use an adjustable wrench to loosen the packing nut around the stem.
- Pull out the stem and inspect the washer and O-rings. Replace any worn parts.
- Clean all components and the valve seat to remove mineral buildup.
For cartridge-style faucets:
- Loosen the retaining nut or bolt around the cartridge using pliers or a wrench.
- Carefully pull the cartridge out, noting its orientation for correct reinstallation.
- Check for mineral deposits or damage; clean the faucet body with vinegar if necessary.
Replacing worn parts is the key to stopping the leak.
Step 5: Install the New Washer or Cartridge
Washer-style:
- Slide a new washer onto the stem and replace any damaged O-rings.
- Lubricate O-rings lightly with plumber’s grease for smooth operation.
- Reinsert the stem and tighten the packing nut securely.
Cartridge-style:
- Align the notches on the new cartridge with the grooves in the faucet body.
- Slide the cartridge into place carefully, ensuring it is fully seated.
- Tighten the retaining nut by hand first, then use pliers for a final snug fit—avoid overtightening.
Proper installation ensures a tight seal and prevents future leaks.
Step 6: Reassemble the Faucet
After replacing the internal components:
- Place the handle back on the stem or cartridge.
- Secure it with the screw and replace the decorative cap.
- Double-check that the handle operates smoothly and the faucet components are aligned.
Careful reassembly avoids stripped screws or misaligned parts that could cause leaks later.
Step 7: Turn the Water Back On and Test
- Slowly restore the main water supply.
- Open both handles to check for leaks.
- Test hot and cold water separately to ensure each side functions correctly.
- If a drip persists, double-check the washer, O-ring, or cartridge alignment.
A properly repaired faucet should operate without drips and handle rotation should feel smooth.
Common Mistakes to Avoid
Even small errors can lead to frustration or further leaks. Avoid:
- Forgetting to shut off water before starting repairs.
- Using the wrong size washer, O-ring, or cartridge.
- Overtightening nuts or screws, which can damage the faucet.
- Ignoring corroded valve seats or mineral buildup, which can cause recurring leaks.
Taking your time and paying attention to detail is key to a successful repair.
When to Call a Professional
Some issues may be too tricky for DIY:
- Persistent leaks after replacing washers or cartridges.
- Corroded valve seats that cannot be cleaned or resurfaced.
- Old or uncommon faucet models with hard-to-find parts.
- Broken or damaged plumbing behind the faucet.
A plumber can quickly resolve these problems and prevent water damage.
Tips for Maintaining Your Bathtub Faucet
Regular care can prolong your faucet’s lifespan:
- Inspect handles and stems for wear every few months.
- Clean mineral buildup from the faucet body and aerators.
- Avoid using excessive force when turning handles.
- Replace washers, O-rings, or cartridges at the first sign of wear.
Simple maintenance prevents annoying leaks and costly repairs.
How Much Does a Two-Handle Faucet Repair Cost?
Doing it yourself is much cheaper than hiring a plumber:
- Washers and O-rings: $5–$15
- Cartridge replacement: $15–$50
- Basic tools (if not already owned): $20–$40
Professional repairs can range from $100–$200 for labor, making DIY a cost-effective choice.
How Long Does a DIY Repair Take?
- Minor washer or O-ring replacements: 30–60 minutes
- Cartridge replacements: 1–2 hours, depending on faucet condition
Patience is important; rushing can result in stripped screws or misaligned parts.
Frequently Asked Questions
Q: Can I reuse old washers or cartridges?
A: No, worn parts are usually the cause of leaks. Replacing them is essential.
Q: Do I need to remove the spout to fix a leak?
A: Usually not, unless water is dripping directly from the spout.
Q: Why does my faucet drip after repair?
A: Likely causes include misaligned parts, overtightened or undertightened nuts, or a corroded valve seat.
Q: Are two-handle faucets harder to repair than single-handle faucets?
A: Slightly, because you manage two stems or cartridges, but the basic repair steps are similar.
Final Thoughts
Fixing a leaky bathtub faucet with two handles is a doable DIY project for most homeowners. By identifying whether your faucet uses washers or cartridges, replacing worn components, and carefully reassembling the faucet, you can stop leaks and save water. Regular maintenance and attention to signs of wear will keep your faucet in great condition for years.
Leaky faucets don’t have to disrupt your day or your budget. With the right tools, parts, and patience, you can confidently tackle this repair yourself.